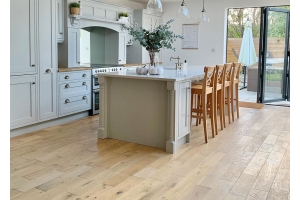
Engineered wood flooring can be fitted by secret nailing, floating or glue-down installation methods. This handy guide will explain the glue-down process in full, as well as give you some useful hints and tips to help you along the way. Here's the ultimate guide to help you glue down Engineered Wood Flooring.
What is a glue-down installation?
Glue-down involves gluing your engineered wood flooring direct to your sub-floor. You will need to add an even layer of glue/bonding agent across the surface of the sub-floor as well as gluing in-between each of the planks tongue and grooves, before slotting them into place.
Important: For concrete sub-floors a DPM (Damp Proof Membrane) is required. You must let this fully dry prior to fitting. If you are going to glue your floor down to a wooden subfloor, make sure you use a wood-to-wood adhesive. You do not use underlay with a glue-down installation.
Fitting Engineered Wood Flooring with a Glue-down Fixing Method
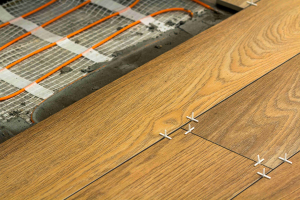
Prepare your sub-floor - Your sub-floor preparation can affect the overall performance of your flooring so it’s important to get it right. You must check the moisture levels are acceptable (average of 6-9%), ensure the sub-floor is level and clear any dirt or debris. When installing over wooden floorboards it is advised to create a 6 mm ply-wood stud floor to be screwed or stapled to the boards. This will ensure the surface remains flat and smooth.
Before you start – Don’t forget to acclimatise your wood for at least 72 hours before installing. It is also important to leave a 7-10 mm expansion gap around the perimeter of the room. Use wedges or spaces to make sure the gap stays consistent.
Starting point – Choose the longest, straightest wall to use as a guide and lay the boards in the direction you want the floor to run. Make sure the tongue is facing into the centre of the room ready to receive the next row of boards.
1. Glue your Engineered Wood Flooring in Manageable Sections
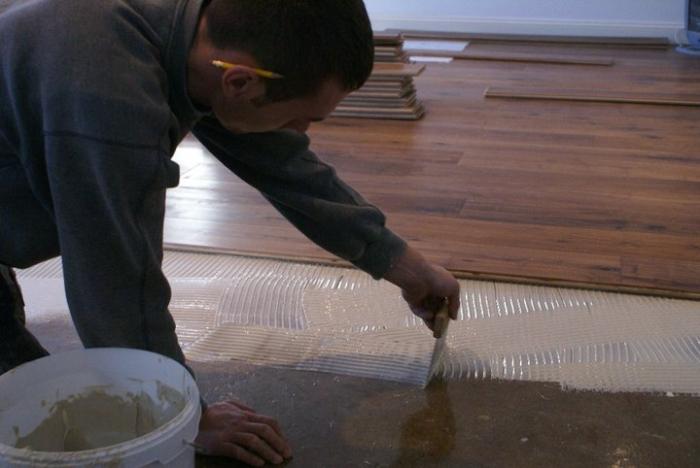
Using string chalk lines, create a glue zone to work within. This is usually spans across the length of the room by around 2-3 planks wide. Creating this manageable section enables enough time to apply an even layer of glue and allow to cure without setting. Refer to adhesive guidelines to ensure you do not exceed the cure time. You will repeat this process once you have filled the zone with boards.
2. Fitting your Engineered Boards
Lay your starter plank down in the corner of the glue zone, leaving a 7-10 mm expansion gap around the wall perimeters (Use your spacers to maintain this gap during installation). Make sure the groove is back to back with the wall so that the tongue is facing towards yourself. Continue for the rest of the row, applying glue to the end groove before laying the wood down at a 30° angle. Ensure that the planks are secure by exerting pressure in the direction of the tongue whilst pressing the plank down to lock the edge joints and secure the adhesive on the sub-floor. If there is a gap along these joints, use a tapping block and a plastic mallet to secure. The last plank on this row may have to be cut to size.
Tip: Any glue that comes in contact with the face of the board should be removed immediately (glue spots can cause damage to the appearance of wood floors especially when dried) using adhesive remover formulated for the glue being used. Follow the adhesive manufacturer’s instruction on adhesive removal. Use clean towels, changing frequently to prevent haze and adhesive residue. If the spot removal damages the appearance of the boards, replace the board.
3. Create the Look
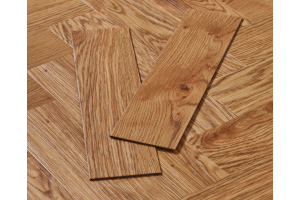
For a more natural looking finish, it is advised to stagger your boards as opposed to a uniform application. To do this, when installing the second row, make sure your first plank is shorter than your starter plank by at least 15cm. You may have an off-cut you could use, if not you can simply cut the plank to size using a regular handsaw.
To install the second row, apply glue to the planks side and end grooves. Holding the plank at a 30° angle, affix it to the tongue of the previous row. This should then slot down into place. Again, ensure the planks are secure by exerting pressure toward the tongue and pressing down to secure joints and sub-floor. Use the tapping block and a mallet to fix any gaps in the joints.
Tip: Keep checking to see if the glue on the joints and sub-floor has set. If it has it will not transfer to the back of the plank so scrape off the adhesive and apply a fresh layer.
4. Repeat the Process
Repeat stage 3 for the remainder of your flooring, creating additional glue zones as you go. Make sure you maintain the expansion gap, continue the random staggering of the planks and ensure there is 100% contact between the flooring and the adhesive on the sub-floor.
For the last row of boards it is likely that you will need to cut them to fit the gap. To do this, measure the distance between the floor face edge (exclude the tongue) to the wall. Subtract your 7-10 mm expansion gap. Draw a line on the wood plank. Cut through the line. Discard the excess piece and proceed with installation.
Important: The last row of boards need to be at least 50 mm wide. Any smaller than this you would struggle to fit and may look a little strange. To avoid any gaps between the joints on your last row use a pull bar to draw the last row to fit tightly to the previous row.
5. Finishing Touches to Complete your Engineered Wood Flooring Install
Cover the expansion gaps with either your skirting or beading and you’re finished!

We’re confident this guide will put you in good stead for a successful glue-down installation. If you still don't feel confident, leave it to the professionals and find a wood flooring fitter. However if you have any questions or need any further assistance, please do not hesitate to contact our wood flooring experts by leaving a comment in the box below. You can also email [email protected] or call 03308 088777.