


Luxury Vinyl Tiles (LVT) are an incredibly popular flooring option in both domestic and commercial properties. It’s well-known for imitating wood and tile with flawless results. Whilst LVT on its own is a thing of beauty, many people choose to enhance their look using feature strips. We’ve put together this complete guide to help you see the impressive difference LVT feature strips can make to your brand new flooring!
What are feature strips?
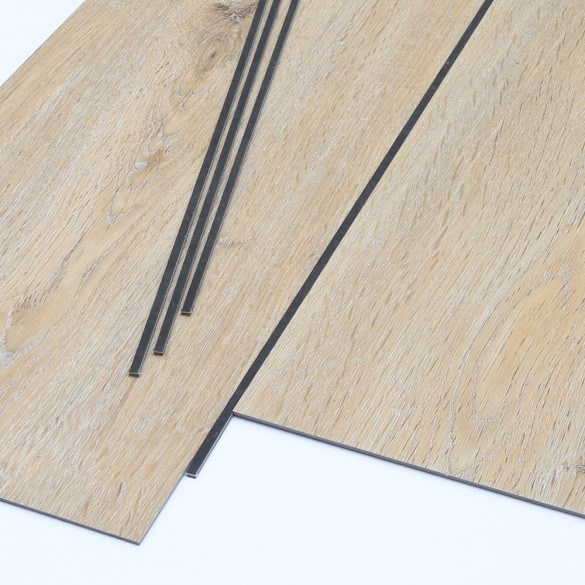
Feature strips often go by different names; design strips, grouting strips, LVT border strips. They all mean the same thing, and act to imitate the appearance of grout. If you’re using real tile, the grout will often be visible to clearly separate each piece. What you’re left with is an aesthetically pleasing and well-defined flooring.
When you’re working with LVT, however, feature strips are often used in place of grout. They’re much easier to fit (more on this later), and will be less time consuming. What’s more, you have complete control over the style you go for. When using real grout you might be limited to specific colours, whereas feature strips come in a whole host of different designs to cater to your own unique style.
Where can you use feature strips?
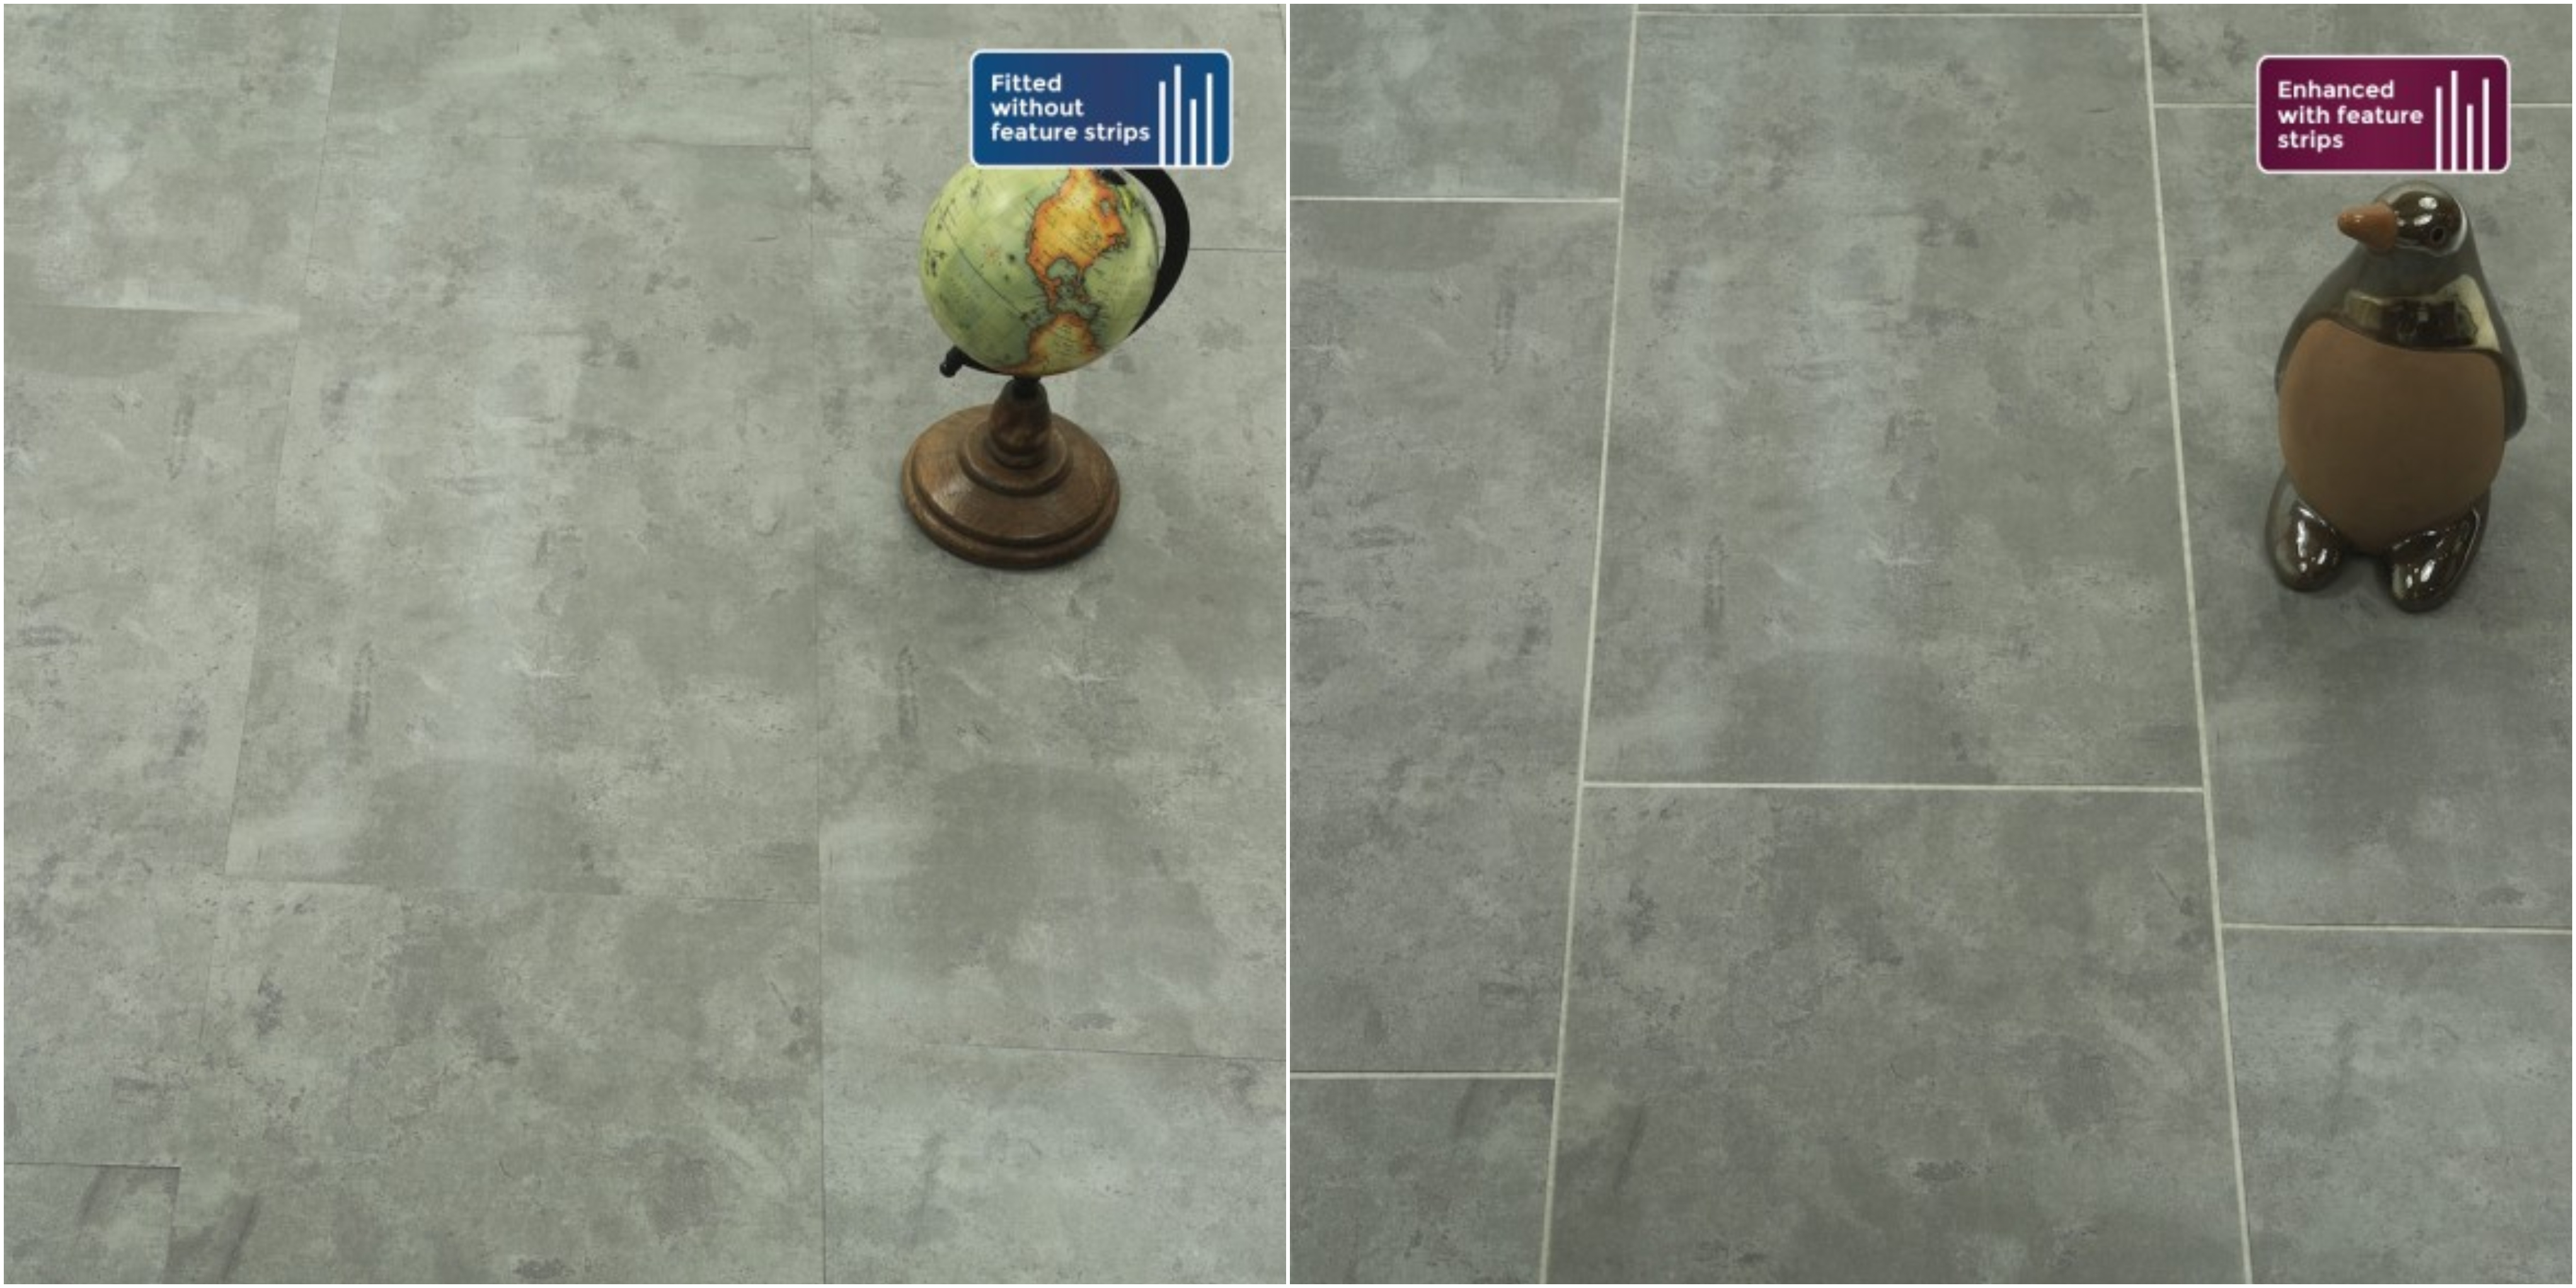
It’s important to note that feature strips can only be used with glue-down Luxury Vinyl Tile, and not the click type of LVT. The strips are fitted around, and subsequently in-between each board. This wouldn’t be possible if you use LVT that fits together using a ‘click’ system, which relies on two pieces slotting together in order to be installed. If you are gluing your flooring, you have more control over the distance between each tile.
Although feature strips are more popular with tiled designs, they can also enhance the look of wood-effect LVT too. It all depends on what you think would look better to match your own style preference. The choice of whether to have feature strips is completely subjective.
See also: 10 Benefits of LVT Flooring
How many feature strips do you need?
When you purchase your new flooring, you’ll need to work out how many boxes of feature strips you’ll need to make sure you’re covered. To make this process as simple as possible for you, we’ve created this handy chart. All you have to do is find the range and size of the LVT you’re purchasing, and times the number in the right hand column by how many boxes of tiles you’re buying.
Please make sure you round up the number. You may end up with some left over, but it’s better to have too much than too little!
Around Each Tile
| Range and Size of Tile | Boxes of Strips Per Box of Tiles |
| Florence – 157 X 942 | 0.80 |
| Florence Tile – 307 X 607 | 0.67 |
| Venice – 157 X 1227 | 1.01 |
| Venice Tile - 307 X 607 | 0.67 |
| Turin – 187 X 1227 | 0.77 |
| Milano – 187 X 1227 | 0.62 |
| Milano (Black Cleft Slate / Dovedale) – 305 X 610 | 0.50 |
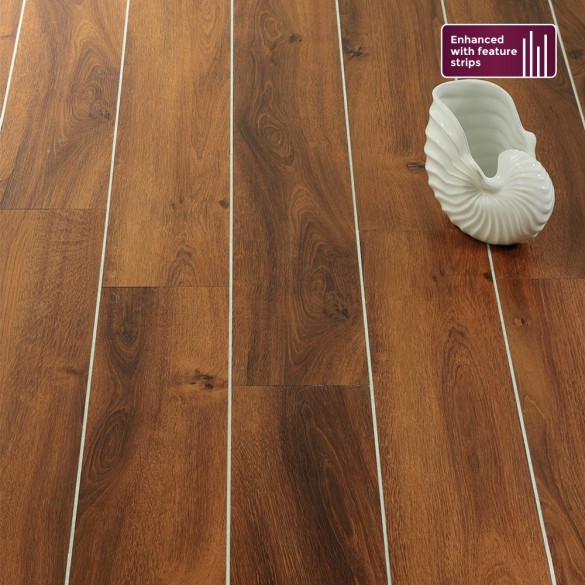
Decking Effect
Use the below chart to work out how many feature strips you need if you’re looking to create a ship’s decking effect (see image). This is created by running feature strips along the tile’s longest edge and eliminating the middle separation.
| Range and Size of Tile | Boxes of Strips Per Box of Tiles |
| Florence – 157 X 942 | 0.69 |
| Venice – 157 X 1227 | 0.91 |
| Turin – 187 X 1227 | 0.68 |
| Milano – 187 X 1227 | 0.54 |
How to Fit Feature Strips
When it comes to fitting your new flooring, fitting the feature strips is a relatively easy process. Any professional flooring fitter will know how to fit them for you. If you fancy yourself as a bit of a DIY-er, you can quite easily fit your own LVT and feature strips yourself.
As we touched upon earlier, you can only use feature strips on glue-down Luxury Vinyl Tiles. This is because the strip needs to fit tightly to the edge of each tile.
You’ll need to plan how the strips will be laid, similar to how you’d plan how the flooring will be laid. This is to avoid having four pieces all meeting at a common corner. Full pieces should all run in the same direction, and then pre-cut the pieces that will run the opposite way.
Commonly fitted in a staggered pattern, this would require a starter tile cut shorter than the rest to offset the next row and keep the staggered flow. The feature strips simply fit round the perimeter of each tile to finish the look.
If you prefer the uniform look, the tiles can be fitted in a grid like pattern. Again the feature strips simply surround the perimeter of each tile.
If you’re going for something more unique, then why not create a border with your feature strips alike to this design:
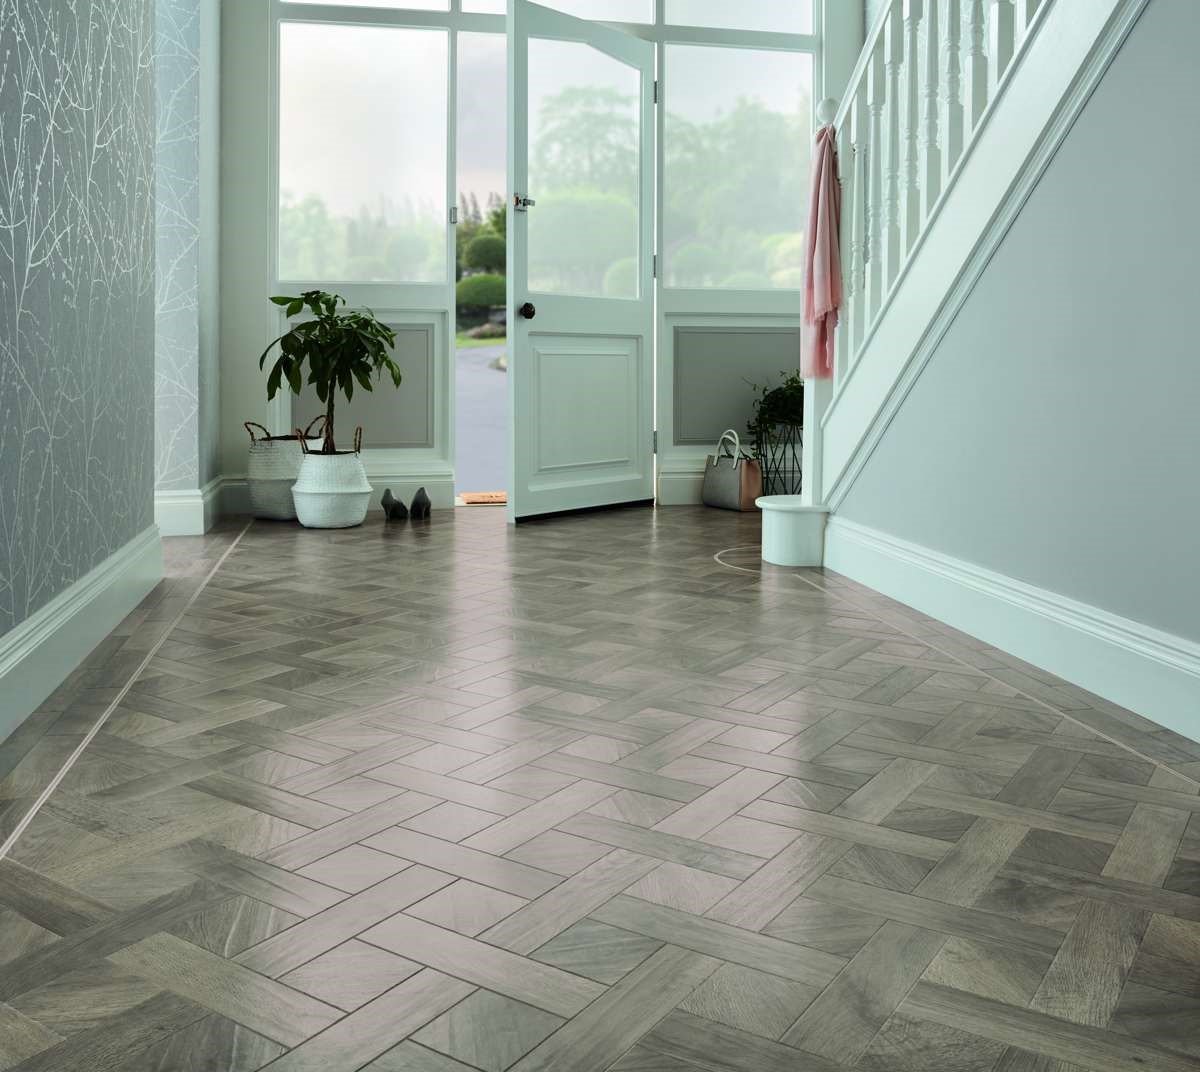
The possibilities are endless. Feature strips are great for those with a creative flare looking to put their own unique stamp on their flooring.
Remember LVT is not treated the same as wood flooring!
It’s important not to leave spaces for feature strips to slot in later. If you do this, the fit won’t be tight enough and could lead to moisture damage or unsightly gaps in your flooring.
Lay the feature strips as you go, making sure each one is fitted as tight as possible between each tile. Glue them down using LVT adhesive, then wipe away any excess before it dries using a clean damp cloth. If it dries, you may struggle to remove the glue without damaging the tile’s top layer.
All of our Luxury Vinyl Tile Glue Down ranges can be complemented using feature strips. Order your free LVT samples from our website today, or get in touch with our sales team on [email protected] or 03308 088777.