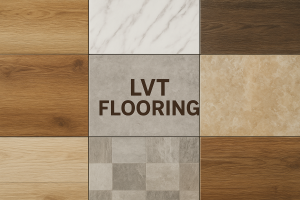
When it comes to luxury vinyl tiles (LVT), there are two options to choose from: click or gluedown LVT. Click LVT (sometimes known as “click vinyl flooring”) is well-known for its quick and easy installation, which means it’s the ideal choice for those who prefer a DIY-approach. Continue reading as we walk you through the process of fitting your new click LVT.
Before we continue, it helps to understand the difference between click and gluedown luxury vinyl tiles. Here’s a quick comparison between the two:
Gluedown LVT
- Cheaper to purchase than click LVT
- Requires a level subfloor
- You can use feature strips to create borders around each tile
- More expensive and time-consuming to fit than click
Click LVT
- More expensive product due to cost of manufacturing the click system
- Thicker tiles than gluedown
- Quick and simple to install
- No glue required
- Cheaper to fit than gluedown
- Best for DIY installations
The higher cost of click vinyl is often subsidised by the lower cost of fitting. A professional flooring fitter will charge less, or you can save even more by fitting your new LVT yourself.
Measuring Your Room
Fail to prepare, prepare to fail. To ensure you make the most of your investment, correctly measuring your room is key. This prevents you from over-ordering (or under-ordering, which puts a delay on your project).
To measure for luxury vinyl tiles, you’ll need to work out your room’s measurements in square metres or square feet. The process is the same for both, it just depends on your preference.
The below video from Flooring Superstore clearly explains how to correctly measure your room.
Preparing Your Subfloor
Even though you’ll be using underlay, it’s still important to prepare your subfloor. A good subfloor that’s ready to be fitted over should be clean, smooth, dry and level.
A damaged subfloor may cause even bigger issues. Cracks or holes can cause headaches down the line, so it’s worth making repairs to your subfloor before laying your underlay and LVT.
You can install LVT over any subfloor. They can also be laid over existing hard floors, such as tiles or wood. Just make sure to check for any uneven areas and repair as needed.
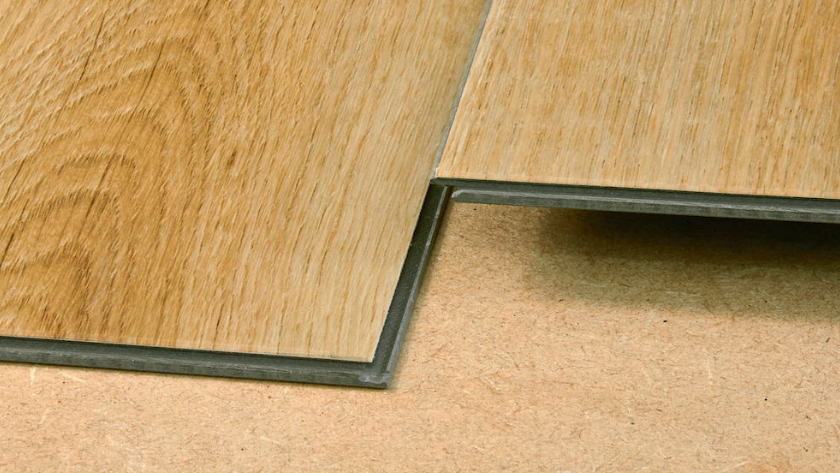
Fitting Method
When fitting click luxury vinyl tiles, you should use a floating installation. If you’re not sure on what this means, we’ve created a comprehensive guide to floating floors which explains in more detail.
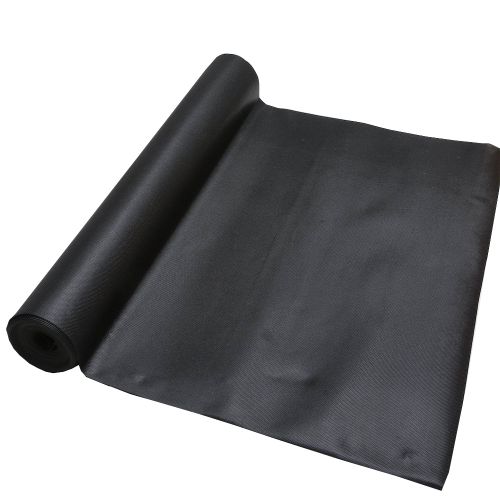
A floating installation is used because each tile clicks in place together, whereas gluedown LVT needs to be glued directly to the subfloor. Because you’ll be floating your tiles, you can use an anti-slip LVT underlay to give you added comfort underfoot. This particular underlay is compatible with underfloor heating, and features a damp-proof membrane to combat moisture from your subfloor.
Planning the Installation
As we’ve said before, preparation is key when it comes to a DIY installation. There are a couple of things you should plan ahead before you begin laying your luxury vinyl tiles:
Which way to lay your planks
Depending on your room size, you may want to lay your LVT planks in a certain direction to maximise the illusion of space. Running the planks parallel to the longest wall will help make a small room or hallway appear longer. You may also lay planks across the width of a room to make it appear larger, or facing a window to follow its line of light.
Plank length
When laying your flooring, you want to avoid being left with odd-sized planks. For example, you could find that some rows are left with tiny planks needed on the end. To avoid this problem, measure the length of your room and plan how you’re going to lay your planks. If you find yourself with any end planks that are under 50mm, simply cut the first plank in the row to allow for a longer one at the end.
Tools Required
Because click vinyl flooring is so simple to fit, you need very few tools to get the job done:
- Utility Knife
- Tape Measure
- Straight Edge
- Spacers
- Crow Bar
- Tapping Block
- Roller

To make the process easier, we recommend a luxury vinyl tile fitting kit, which includes spacers, crow bar, tapping block and a heavy duty roller.
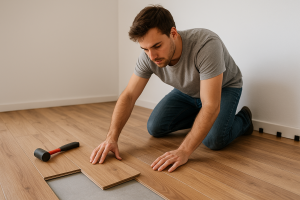
Fitting Your Luxury Vinyl Tiles
Now we’ve finally completed all of the necessary prep work, it’s time to start fitting your LVT.
- Take your utility knife and cut the click system from one side of the plank. This is so the plank fits flat against the wall. You’ll need to do this for each plank in the first row.
- Begin laying your planks form the left side of the starting wall. Don’t forget to use your spacers between both the short and long side of the plank. When fitting your LVT, always ensure there is a spacer between the vinyl plank and wall to create an expansion gap.
- Fit the next plank in the row by inserting the tongue side into the groove of the previous plank. Use the roller and run it over the seam between the two planks to ensure a proper fit. Repeat for the remaining planks in the row.
- The last plank will need to be cut. Measure the distance between the wall and the previous plank; don’t forget to use the spacer when measuring. If the measurement is under 20cm, it’s best to cut the first plank in the row. This makes for a more aesthetically pleasing floor.
- To cut a plank, use the straight edge and utility knife to score the surface of the plank. You can then simply snap the tile at the score line.
- If the offcut from the vinyl plank is over 20cm, you can use this as the first plank for the next row.
- Click the long side of the next row’s vinyl plank into the first row.
- To fit the second plank in this row, position the long side of the plank with the tongue side overlapping the groove of the planks in the previous row. Then, pivot the plank down and fit the tongue and groove on the short sides together. You can also fit all of the second row planks together and then click into the previous row after. Ensure you use the roller on each plank to ensure a tight fit.
- Continue to work from left to right, row by row. You may need to cut your final row to size. If you need to do this, measure the remaining area (including your spacer) and cut your planks to size. Ensure you cut the right side, as you’ll need to make sure the final planks will click into place with the previous row.
- Remove the spacers from the perimeter of the room.
Finishing Touches
Once you’ve finished fitting your luxury vinyl tiles, there are some small finishing touches to complete the look.
Door bars
For any doorways, choosing the correct door bar is important to create a seamless aesthetic. The floor height and type will influence which you should go for. Door bars are easy to install, just position centrally over the threshold and cut to the right length before fitting.
Scotia
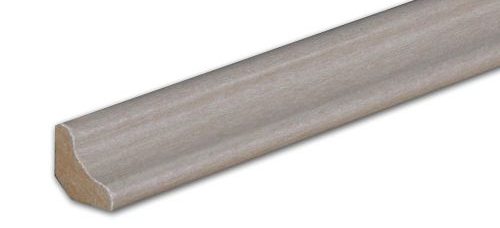
To hide the expansion gap around the perimeter of the room, scotia can be fit on the walls of your room. Cut your scotia to size and apply PVA glue to the back and glue to the wall. Don’t glue your scotia to the floor, as this may cause damage. Use panel pins to hold the scotia in place.
Skirting
Skirting board is another great way to finish your room’s look whilst hiding expansion gaps. We’ve found the video below from Handyman Magazine is a great simple guide on how to fit skirting.
Maintain the Look
A popular feature of luxury vinyl tile flooring is how easy it is to maintain. General rules for hard floors still apply, such as cleaning up spills quickly to prevent water damage. Whilst LVT may be water resistant, if left for too long and too often, liquids can cause damage over time.
To keep your flooring clean, it couldn’t be simpler. Sweep away surface dirt and then use a compatible floor cleaner mixed with water to clean the tiles.
Our Impero All-in-One Floor Cleaning Kit features an innovative spray mop, as well as compatible floor cleaner and two microfiber cloths. This makes the process so much simpler, and will keep your vinyl tiles looking like new for years to come.
Need some additional help? Get in touch with Direct Wood Flooring’s experts. Email [email protected] or give us a call on 03308 088 777.