


When you buy wood flooring, it’s highly unlikely you’ll use up every last piece. Here at Direct Wood Flooring, we suggest that you allow for wastage when calculating how many packs you should order. So what are you supposed to do with leftover wood flooring? You’ve made an investment in the flooring, so you wouldn’t want to waste it by throwing it away. We’ve got four creative ideas for you to try to make sure none of your money goes to waste!
Before trying out these ideas, you might want to save a couple of pieces in case of damage. Whilst we can’t help with accidental damage, you’re protected from manufacturer defects by our wood floor warranties.
Or, if you’ve got full packs left over, you can take advantage of our free returns and collections policy. We’ll come and collect your extra flooring from you, and you’ll receive a full refund for the flooring you return to us. It’s as simple as that!
Try out these ideas for yourself, and share your photos with us for a feature on our social media pages!
Create a feature wall
Depending on how much flooring you’ve got left over, you could create a wooden feature wall. This is a trend that’s seen increased popularity within the last 12 months. You can do this with pretty much any wood flooring type you have leftover.
This is where you take wood flooring and lay it how you would on the floor, but somewhere on your wall that will stand out and make a statement. You could choose to cover an entire wall, or just one small section can make an impact. The below video highlights the simple process of fitting Laminate Flooring to your walls.
A wood floor feature wall is a great way to tie together different design elements within your décor. Depending on the colour of your flooring (soon to be wall), it can act as a subtle background to a more decorative overall design. Or alternatively, it can take centre stage and stand out from the rest of the room.
If you don’t like the idea of having part of the wall the same colour as your flooring, you could put the feature wall in an adjoining room. This way you create a natural flow and continuity in your décor from one room to the next.
Shopping for a small amount of wood to create your feature wall? Our wood flooring clearance is the perfect place!
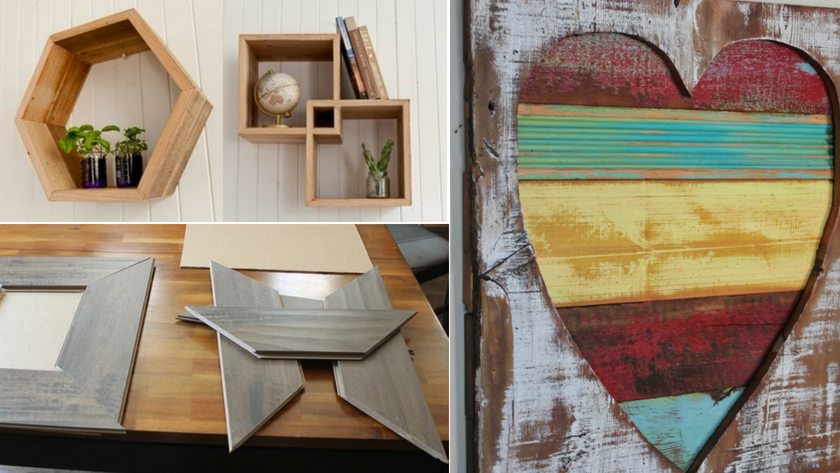
Make decorative shelving units
Just because it’s left over, doesn’t mean your flooring lacks practical uses. If you’re looking for additional storage, your wood floor could hold the key. Making bespoke shelving units perfectly blends decoration and function.
This would work best using solid wood flooring, however it would also work well with engineered wood. Units made from the leftover wood will perfectly tie together your walls and floors.
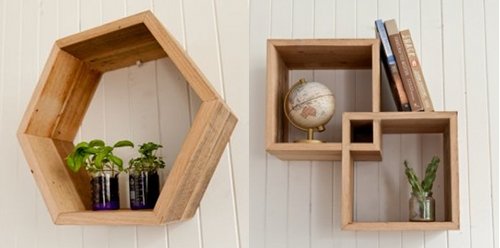 Photo from Theory of Willow
Whilst maybe best left to more seasoned DIYers, if you have the skills it can be great fun to do. There are plenty of YouTube tutorials that will show you how to make a shelving unit from scratch. All you need to do is find one with the dimensions that will work with the amount of wood you have!
Because you’re building them from scratch, you’re able to choose the exact style you prefer. That allows you to match any existing decorative elements within your décor. If you’re not sure about matching the colour with your flooring, you can always re-paint the wood to give it a completely new design.
Create a piece of furniture
With herringbone flooring being so popular, it would be a shame if any were to go to waste!
One of our customers had an incredibly creative use for his herringbone wood flooring. It doesn't need much introduction, as you can see the results for yourself.
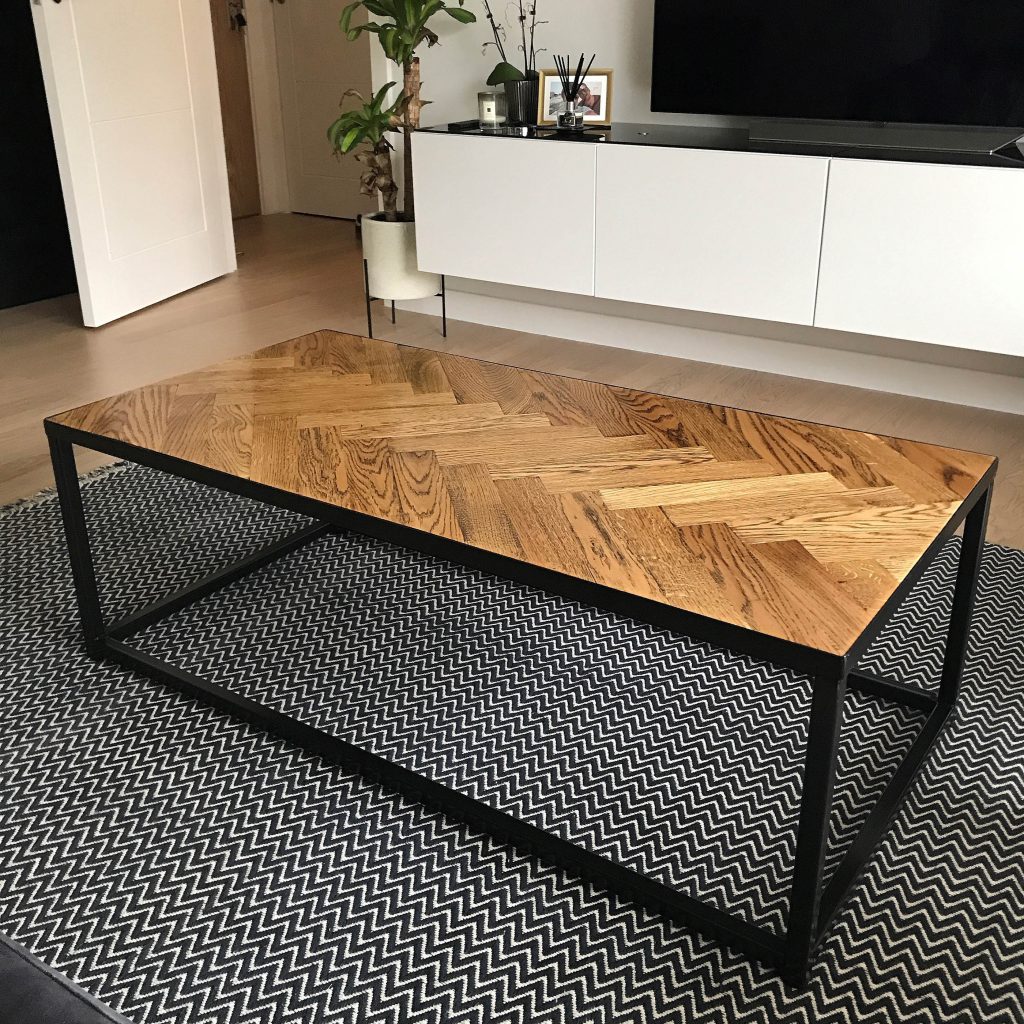
This is, of course, for those who are more experienced in DIY projects. However, if you were to buy the table frame ready-made, the rest of the work is no different to trying your hand at a DIY flooring installation!
If you don't fancy it yourself, you could always enlist the help of a friend or professional.
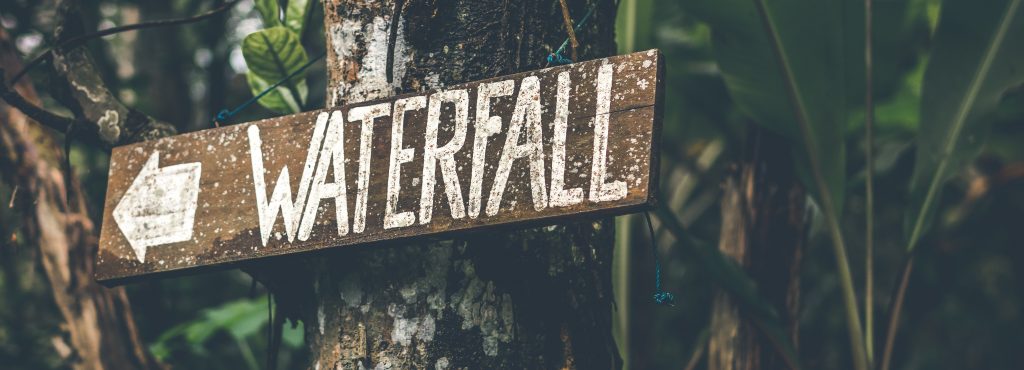
Rustic signs and artwork
If you’re struggling to find a practical purpose for your leftover wood, you could create some brand new artwork. This way, you know that you’ll have a truly original and unique piece in your home. Or, it would also make a great gift. This is an idea that works perfectly in rustic home décors.
This example from Beyond the Picket Fence shows just what you can do with some reclaimed wood and a little imagination. You could work with your leftover wood to create something similar, or completely bring your own ideas to life.
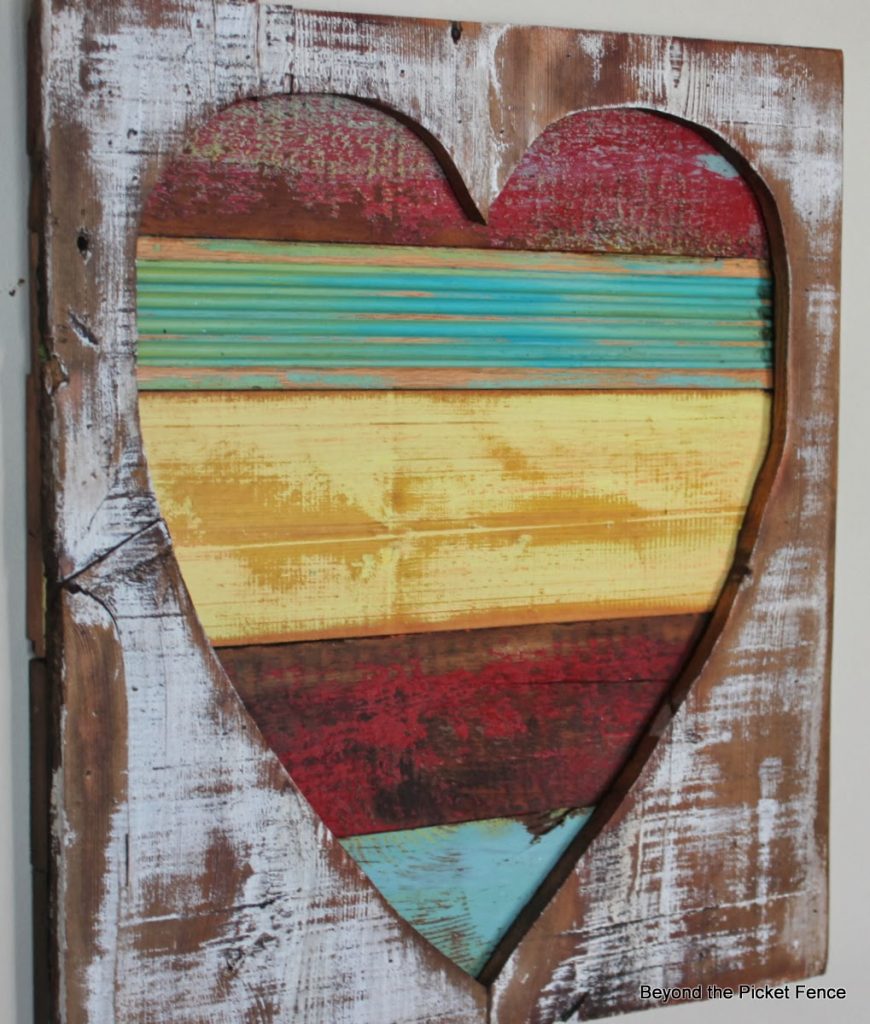 Photo from Beyond the Picket Fence
Another form of art you could create may be rustic signs. You can often find a place for a wooden sign anywhere in your home. Whether it be hanging on the bathroom door or outside in the garden, they add a certain charm that many pay good money for.
All you need to do is paint over your existing wooden planks. Or, if you’d like a completely different look, you could paint the wood for a different background colour. Once you’ve got your plank sorted, write your favourite quote, family members’’ names, or anything you’d like on your sign.
If you don’t fancy going it freehand, then you can use a free online stencil maker. Here you can choose your font, write your text and then download and print your stencil. All you need to do then is paint over the stencil!
Create a picture frame
Why spend even more money on a wooden picture frame? With leftover wood flooring, you can quite easily make a picture frame that will match your room’s design.
You’ll need to cut off the tongue and grooves of your wood to create a conventional wooden plank. Sand the wood down so it’s smooth and even, and cut the planks to size. For a full guide on creating a photo frame from leftover Laminate Flooring, check out this step-by-step guide.
You’ll need to cut each end at a 45 degree angle, then sand and glue together using an appropriate wood adhesive. Once dried, you have the front of your frame ready. Glue, or nail, a piece of plywood to the back of your frame, ensuring you leave a gap for your photo to slide into.
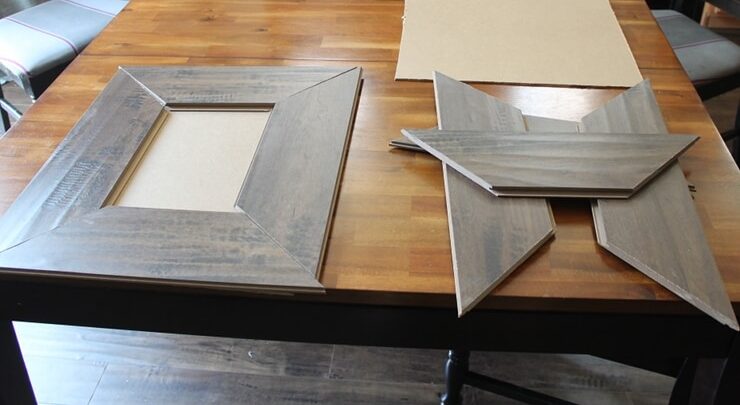 Photo by Persia Lou
If you’re adding a glass cover for the photo, when you’re creating your frame you’ll need to add the glass in at this stage. Cut slots for the glass and fit the four sides around it, ensuring a snug fit. Once you’re happy with how it fits, glue the four sides together whilst keeping the glass in place.
Whether you decide to keep all of your leftover wood flooring, or send it back to us using our free returns service; hopefully there are some creative ideas you’d like to try out here.
If you would like to return any full packs of wood to us, please call a member of our customer service team on 03308 088777 to arrange a free collection.